Friday 11 July 2014

Another my game on AppStore

It won't be added to content of course, but I would like to show you a game that was shipped lately. Hellraid: The Escape was made using UE3, it's logical-puzzle-adventure game that I've worked on for couple of months. Really recommended for everyone that like puzzles and don't like F2P games. It was created almost completely using Kismet/Scripts.

You can buy the game on AppStore here. 

You can also check Hellraid for PC which use Chrome Engine. 

Wednesday 2 July 2014

Prototype - Golem melee enemy

Next enemy will be slowly melee Golem from DLNK.
Specs:
  • If you shoot at the center of him you will heal him,
  • You need to shoot in head to make real damage,
  • It will be slow,
  • He will use melee damage,
Fix Pick Location Task
Open MainAI_Pawn and create new float variable: ProcentageOfRoute. Default should be 0.7.

Open PickLocation task and change random Min to ProcentageOfRoute. Thanks to that we will have option to change this functionality in other enemies.
Animations.
Import Golem from Unity - if you don't know how to do that read post about importing Sci-fi pack. 

Create new Animation Blueprint from SkelMesh. Add one bool variable: IsNearPlayer. Create new blueprint - Golem_Pawn extending from MainAI_Pawn and add the same variable to it.

Now in Animation Blueprint read out this variable from Golem_Pawn
At this point reading variables from your characters should be easy. If it's not - read earlier posts! Don't be lazy!

Now we need to:
  • Start moving Golem to Target,
  • When we hit him - play hit animation,
  • When he is near player - he need to play attack anims,
You should read this documentation about Animation Montages. So in our Anim Graph create something like this. We are blending from ArmoredGolemSpine1 bone.
Thanks to this we will be able to play our animations from anim montages. 

If you right click on your animation you will be able to create Animation Montage from it. Create Animation Montages from Hit1, Hit2 and Hit3. Remember to name your slot like here (it's used in Animation Blueprint) 
Create another animation montage from Attack1. Open it. Create two montage sections: Attack1 and Attack2. If you right click on Montages you can create new ones.
Drag your Attack1 animation to Attack1 montage section and do the same with Attack2 animation. 
For me the dragging isn't always working so you need to keep trying. You should have something like this when everything will be ready:
So basically this montage is playing 3 animations. What I weren't able to find is to play them with random. It can be done using blueprints but I will leave it now. 

Now open your Golem_Pawn and add one bool variable: isDead. Assing your mesh and your animation blueprint to the Pawn, and setup Walking Speed in CharacterMovement component. You should change SpawnManager to spawn Golem_Pawn to be able to change everything.

Create new Begin Play funcion in Golem_Pawn. We need to check where is player to change the isPlayerNear bool and run the attack animation.
And add Point Damage event to run the hit montages.
At this point Golem should walk to Target, play hit animation and attack animation when he is near. 

Shooting at Golem and healing/killing him.
Open Golem skel mesh and one socket: Heal (from ArmoredGolemSpine3) and Head (from ArmoredGolemHead).
Now open MainAI_Pawn and we would need to change Crit Damage hardcoded values to be editable. So create new float variables: HowNearHeart (10), CritMultiply (2) and connect them.
Still in MainAI_Pawn point damage. Create custom Event: WasCrit and connect it where you know that there will be critical damage.
Thanks to that we can now implement some custom functionality when crit. 

Open Golem_Pawn and attach Hearth to Head socket in begin play event.
So the head will move now with the socket. 
Go to the Event Graph and add new WasCrit event - connect your hit animations to it like here:
Now let's move to healing him. Make sure your Heal socket is in center of his "reactor". 
Go to Golem_Pawn and add new vector variable HitLocation which you will set in Take Point Damage. If we hit near the socket we won't be dealing any damage, we will heal the Golem for 10%. 
Let's move to killing the Golem. Later in your Point Damage we will randomly run animation or ragdoll.
Make sure you have your ragdoll setup properly. I needed to use SetWalkSpeed because weren't able  to StopMovement while it's moving from AI Tree. It's a hack, and what you should do is to prepare your AI Tree so it will be able to stop when you want.

Melee Damage
Basically in games that use melee attack you should do the traces from your weapon and check if collide with something. In our example it would be much more simpler.

We will use Custom Anim Notify to let the blueprint know that there was player hit. We have created custom anim notify earlier so you should read older posts. 

Create new blueprint extending from AnimNofity. Name it EnemyAttack. Open MainAI_Pawn and create custom event, name it Attack. 

Now in AnimNofity Enemy attack let's call Attack in MainAI_Pawn.
Now you just need to add EnemyAttack notify in your animations. I've added to AttackAnimMontage.
We will use this Nofity later after we add player health. For now it's done.

Adding sounds
Footsteps: here you can find some sounds I've mixed them with metal sounds. Just try to do the sound cue by yourself, and create SoundNotify in your walk animation to trigger the sound. 

Attack: https://www.freesound.org/people/Matvej/sounds/157890/
Dying:
Here you can find some sounds that can fit:
https://www.freesound.org/people/Corsica_S/sounds/106576/
https://www.freesound.org/people/artfwo/sounds/63838/
https://www.freesound.org/search/?q=transformers&f=&s=score+desc&advanced=0&g=1
https://www.freesound.org/people/suonho/sounds/23695/
https://www.freesound.org/people/JarredGibb/sounds/218270/
https://www.freesound.org/people/RADIY/sounds/213147/

Hit sound: this should be helpful:
https://www.freesound.org/people/copyc4t/sounds/235740/
https://www.freesound.org/people/tigersound/sounds/9092/
https://www.freesound.org/people/SpeedY/sounds/62905/
https://www.freesound.org/people/gowers/sounds/131592/
Now in your Golem_Pawn blueprint go to WasCrit function and play your soundcue. 

At this point you should be able to find the sounds you like, create sound cues and play them in animation or blueprint.
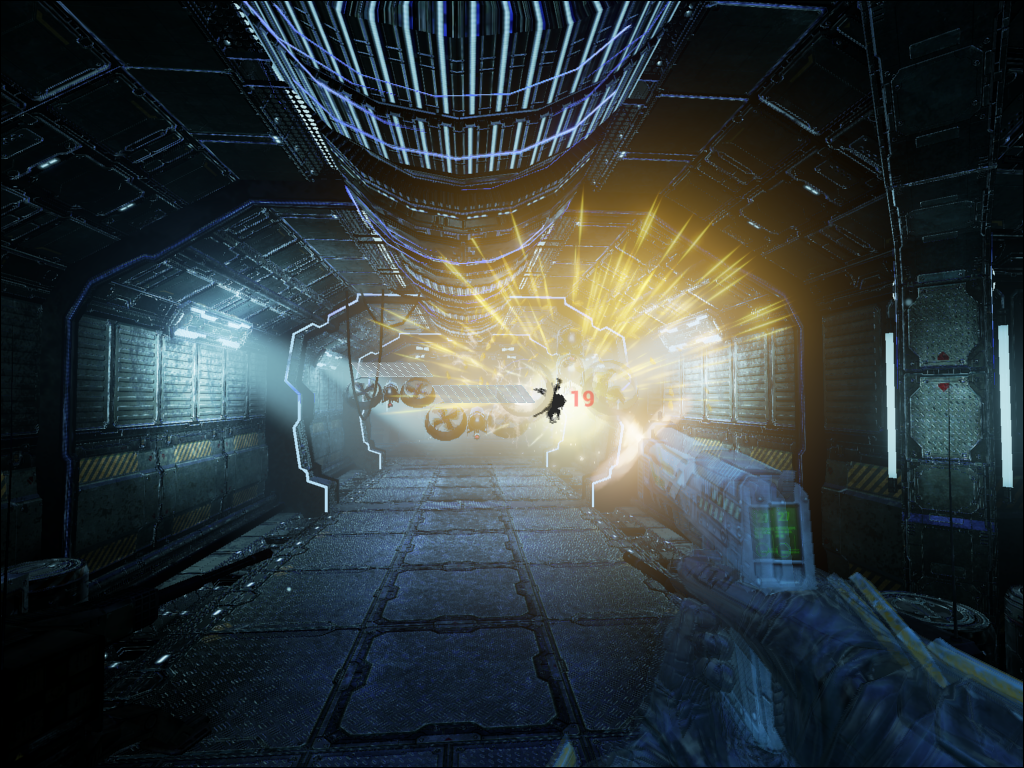
Final effect

In next post I will add another enemy.

Due to refactoring I'm moving to new blog which can be found here: www.shootertutorial.com

See you there!

Sunday 29 June 2014

10 000 views, thanks!

I just wanted to thank you all for reading the blog! It's motivating me to to post more often. Blog has been online for couple of weeks now and Today you have break 10 000 views. I'm happy to help you guys! Don't forget liking my Facebook Page;)

Friday 27 June 2014

Prototype - Flying, Exploding Drone

Enemy spec's:
  • He flying to player,
  • When he collide with player he will explode,
  • He will have different SpawnPoints, (above the ground),
  • He will be quick, 
  • He will have really low health,
  • After dead he will explode and make radius damage that can hurt other enemies as well,
It sounds it will be hard but it's super easy. I will be using MainAI_Pawn as a base for this enemy, so keep that in mind and read earlier posts.
Asset
Again will use PA SciFi Enemies and Vehicles and use Drone. I've combined all of the meshes and added two bones to the engine. You can download FBX here.
After import create PhysicalAsset for the mesh. Delete all of the bodies and create own by yourself. I've used Single Convex collisions and enabled bone break. If you don't know how to do that please read earlier post.
Animation BP
Right click on your Mesh and create Animation Blueprint. Name it Drone_AnimBP. Add new float variable: Current Rotation, and in Event Graph add some value to it.
This value will be used for gear rotation. Move into Anim Graph and add couple of Modify Bones blocks. You should know how to do that if you read earlier posts ;) 
That's all here. 

Drone Pawn
Now create new Blueprint extending from MainAI_Pawn and name it Drone_Pawn. Assing mesh to it and set animation blueprint. 

Let's do the same as earlier with Speed and Scale, you should be able to do it by yourself now. Just try it! The goal here is to have random scale and random speed. Before you start you can change Walking to Flying mode. To do that just add Begin Play event and set movement mode like here:
Thanks to this your Drone will fly now. If you want to test it out just change spawning actor in Spawn Manager to Drone_Pawn. That's all. Last thing is health this actor should have low health something like 10. 

Adding Radial Damage
Go to MainAI_Pawn and create RadialDamage event. I'm copying almost everything from PointDamage.
Now in Drone_Pawn add AnyDamage event and manage health.
Now when you kill Drone it will create radial damage and make damage to all other's enemies in radius. Unreal is making the magic where if enemy is near the explosion it will get more damage.

Flying Movement.
Well I've see that MoveTo isn't working correctly with Flying Characters yet so everything connected to Flying can be thrown to trash :) We will do our own movement then. 

This one is easy but blueprint is some kind of complex. I will use MoveComponentTo which needs Time to move from point X to point Y. First I need to process my Speed to move over time from point X to Y. 
So every time MoveComponentTo will fire - it will move the same speed even when route length will be different. That was the hardest part, let's move.

Create new blueprint "DroneController" extending from AIController. Open your Drone_Pawn and change AIcontroller (in Defaults) from AIController to DroneController. Thanks to that our Behavior Tree won't fire on this Pawn. So it won't pick location and move to target. 

Go back to content browser and create new Enum - DroneState which should have: MoveToPlayer, MovingUp and Dead.

Open drone Mesh and add two Sockets from RootBone: EndTraceSocket, TraceSocket. Don't change rotation! 
We will use them for tracing.

Open Drone_Pawn add some variables:
  • DroneState - which should be DroneState enum,  (set it to MoveToPlayer in BeginPlay,
  • Speed - float,
  • OverTime - float,
You need to set Speed and Over time in Begin Play event. Just copy above's blueprint. (two images up :) ) 

We will create CustomTick that will fire every 0.1 seconds. In UE3 there was timers I wasn't able to find them in UE4 but we can do something like that using blueprints. 

I tried to comment everything, here is the blueprint. Basically we are moving Drone to TargetPoint. If Drone is near someone he will move up and try to avoid it. If avoided - move again to TargetPoint. It's simple. The best way to learn is to try to create it by yourself - don't copy my blueprints! And - I'm not a programmer so don't trust me! :)
How it will avoid:
It's far from perfect but it's doing his job. I will polish it later: movement speed, re-tick delays, rotating mesh and engines.


Different Spawn Points
Just place couple of spawn points where you want to spawn Drones. I've created bunch of them, one higher one lower. I've renamed them so I know which one is for Drones. You need to have couple of Target Points near player as well. They should be near player so Drones will collide with him.

Now in your SpawnManager create another array for SpawnPoints and name it DroneSpawnPoints and add your spawn points to it. If you don't know how just read earlier posts. 

In SpawnManager Graph just change foreach from SpawnPoints to DroneSpawnPoints. Remember to assign CurrentSpawnPoint when spawning Drone_Pawn. Here's BP for everyone that haven't read earlier posts.

Adding Explosion Effect

I will use P_Explosion_Bomb as a template I'm not sure where I found it - you will need to download some Marketplace content and search for it.

Create an copy and name it Drone_Explosion. Disable Fire and Smoke emitters. I've deleted GPU Sprites as well because they won't work on Mobile. I've changed emitters scale to be smaller.

Create another Socket base on RootBone - name it ExplodeSocket. It will be used as impulse location for small explosion. 

Now go to Drone_Pawn and where are you enabling simulation add Radial Impulse. 
And spawn your particles when exploding. After explosion change DroneState and before it check if it isn't Dead because you will spawn a lot of particles there!
Adding Sounds
Explosion: I've found a lot of good sounds:
http://www.freesound.org/people/Nbs%20Dark/sounds/94187/
http://www.freesound.org/people/funhouse/sounds/2514/
http://www.freesound.org/people/tcpp/sounds/132098/
http://www.freesound.org/people/animationIsaac/sounds/207322/
http://www.freesound.org/people/funhouse/sounds/2513/
http://www.freesound.org/people/lorenzosu/sounds/72069/
http://www.freesound.org/people/Sancho82/sounds/78457/
http://www.freesound.org/people/Andromadax24/sounds/169775/

Import them into UE4 and create new Sound Cue. Iv'e created something like this:

Parts on hit: I will use some of those: http://www.freesound.org/browse/tags/MetalHit/
Create another sound cue and try to experiment to get the best results.

Open your drone Physical Asset and select all bones and enable Simulation Generate Hit Events thanks to that our mesh will fire Hit event on RigidBody collision.

Now go to Drone_Pawn right click on Mesh and create Hit Event.
I'm using vector length to fire up the sound because this event will popup almost like a tick. 

Engine sound: http://freesound.org/people/zippi1/sounds/17951/
Create new sound cue using this sound:
Now in your Dron_Pawn create Audio Component with this sound. It should have Auto Activate turned on. Before killing Drone you should deactivate this sound.

Attack Player
Open Drone_Pawn and create new variable which will be HitResult type. In your custom tick lets check where the player is. It would be better to use some collision events for this but this will work as well.
What you can do by yourself is to implement Drone state: AttackPlayer - when Drone is near (something around 250) he can start moving faster and rotate to player as well. 

Final Effect
In next post I will add another character - this time something more humanoid;)

Sunday 22 June 2014

Prototype - Spider Polishing

Remember: 20% of your work is creating something and 80% is polishing it. This is something that lot of developers don't remember and when answering question "how much time you need?" the answer is 20%, not 100%.

So let's move into first polishing iteration of a spider. What I would like to fix:
  • Spider should rotate to player when shooting (the place where it's shooting),
  • Various spider speed,
  • Better impact effects,
  • Better dying effect,
  • Spider lasers are really annoying I can't see anything when they are shooting,
  • Bug: spider is above the ground,
  • Bug: they are still shooting at me when health < 0
And I have one thing in backlog: spider should move on walls/envrio but this is something for different post ;)

Rotate when shooting
Go to SpiderCharacter. Find MyAttack function and interpolate actor rotation like here:
Various speeds
In SpiderCharacter create new float variables:
  • MaxWalkSpeed: 160,
  • MinWalkSpeed: 80,
  • WalkAnimRate,
And add this into end of your Begin Play event.
Go to Animation Blueprint and create float variable: WalkSpeed. Open Anim Graph and find SpiderWarior_MoveForward sequence. When you click on it properties will popup. Pin Rate and assing WalkSpeed.
It's all. Try to change MaxWalkSpeed to get the best results.

Impact effect
We will use particle from Shooter Example: P_Body_Bullet_Impact.

Go to MainAI_Pawn and create new Particle System variable, default should be set to P_Body_Bullet_Impact. 

Now in Event Point Damage spawn emitter at location like here:
Dying effect
I will create ragdoll effect with bone break as well. First of all you need to have Physical Asset prepared. There is great tutorial about them here. You need to watch it all. 

Prepare your physical asset and in SpiderCharacter blueprint go to Take Any Damage event. You should have if health<0 then. Pin your ragdoll when you know that health < 0. I've pinned it with random bool as well so it won't be ragdolling all the time. 
If you want to break bones. There is an option for that in PHAT.
You should experiment with PHAT/ragdolls/breaking bones to get better results that I've.

Lasers
Just change your start color because it's to big and bloom is enabling. You can work with noise and size as well. Just experiment to have "Spider lasers are really annoying I can't see anything when they are shooting" resolved ;)

What you could do is set Target of Beam more randomly and higher. Just go to SpiderAttackNotify and to Notify Begin and add this as Target.
Sounds
There is a great site here with lot's of SFXes to use. I will put names of sounds that I will use from this site.

Before Attack Sound: "Science fiction steampunk robot spider scuttle"
Now go to your Attack Animation and create new Sound Nofity with this sound. 

Attack Sound: "Electricity High Voltage Spark Continuous Arcing" I've used Audacity to make the sound smaller.
Go to your SpiderCharacter and create new Audio Component with this sound, name it AttackSound. Auto Activate should be disabled. Now go to custom SpiderAttackNotify and in Begin Event get AttackSound and activate it. In End Event just deactivate it. That's all.

Steps sounds: "Person walking along metal bleacher isle." I've used Audacity to make each step different file. 
Pluging them into your project is really simple. Create Sound Cue - we have created couple of them earlier.
And now in Walking animation just create Sound Notify with this sound and enable bFollow.
 

Dying Sound: It's really hard to find anything good so won't be doing that now.

Spider is above the ground
This is really simple. Just go to SpiderCharacter and move Mesh down. You can use "ghost" or "toggledebugcamera" console command in-game to check if it's on the ground.

Spider is still shooting when health < 0
In SpiderCharacter find MyAttack function and before you change SpiderState check if State is < 2. 
It will prevent from shooting if Spider is Dead. As you probably remember SpiderState is 2 when we kill him. 

Still in SpiderCharacter find Damage Event and check if Health < 0. After that you should deactivate Beam.
Now go to your custom Notify: SpiderAttackNotify and check if SpiderState < 2.
You need to be sure that your Beam particle have Kill On Deactivate enabled. (in Required)

Scale
In SpiderCharacter create two float variables: ScaleMin(0.6) and ScaleMax (1.2) and in begin play event set the scale.
Final Result:
Spider isn't finished yet but it's lots of better now. Remember - there is always room for polishing and it's our first polish iteration so we will get back to this topic.

In next post I will add new flying and exploding enemy.